
These were a serendipitous creation. I had some leftover oatmeal. I mean, isn’t there always leftover oatmeal? I wanted to use it for something. I immediately thought pancakes. And as I was reaching for my big lovely glass jar of all-purpose flour, I spied some soba flour that had been kicking around the pantry. Hearty steel-cut oats, earthy soba flour—these were just the pancakes a cold, rainy morning was asking for. None of these fluffy, spring-time flapjacks. Winter calls for foods more substantial.
And I must say, I’m way pleased with them. They have great texture—slightly chewy, toothsome, and spiced just so. And in addition to using up a a food stuff that usually goes directly into the compost, they also freeze wonderfully. These are qualities that further endear any delicious eats to me, and things which I spend a lot of time talking about over at Martha Mcgyver. I kind of HATE pancakes (you SEE the name of the blog, right?) in the amount of babysitting they require on the stove, so cooking up an enormous batch and then freezing them after saves you time and food. Hell yeah.
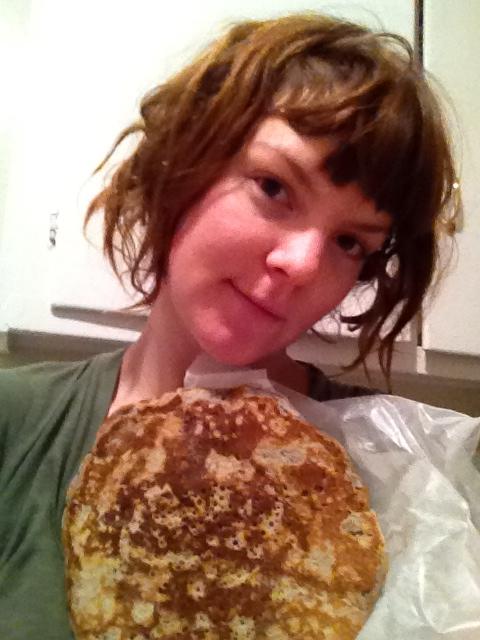
Soba Oatmeal Pancakes
makes approx 8-5 inch pancakes
ingredients:
3/4 C. all-purpose flour
1/4 C. soba flour
2 TBS sugar
2 tsp baking powder
1/2 tsp salt
1/2 tsp cinnamon
1/4 tsp ginger
1/2 C. cooked oatmeal (i prefer steel-cut, but any ol’ oatmeal will do)
1 C. milk or water or milk substitute (i bet almond milk would taste fantastic!)
1 large egg
2 TBS melted butter, coconut or other vegetable oil
1 tsp vanilla
directions:
1. Combine all dry ingredients in a medium-sized mixing bowl, preferrably one with a spout (it makes for easy pouring. Although if you’re being hella meticulous you could also use a ladle to get uniform cakes).
2. Heat a large frying pan over very low heat. You’ll get much better results if you let your pan slowly and fully heat before the pancake cooking commences.
3. Combine all wet ingredients (yes, oatmeal is a wet ingredient!) in a separate smaller mixing bowl (spouts help here too) or if you have a 2 cup+ liquid measure you can mix them in there as well.
4. Pour the wet ingredients into the larger bowl containing the dry ingredients. Mix until just barely combined—It’s okay for it to be lumpy and still have some small pockets of dry ingredients.
5. Make sure that your frying pan is warm (I usually have my gas range dialed to 3 out of 10) and mist with some cooking spray (or butter or oil. Whatever makes you happy).
6. Pour about a half-cup of batter into the pan. This is a thicker batter, so I often swirl the pan a little to help the pancake spread a bit.
7. Once the surface is covered in little bubbles and the edges look less wet, flip! Cook through the other side of the pancake for a few minutes and serve.
These are good with butter and syrup, obviously, but I eat ‘em with just butter as well. Cheers!
No comments:
Post a Comment