Tuesday, January 29, 2013

Butterscotch trailmix cookies

I miss summer.  I miss, miss, miss it.  Sure, I live in Oakland where it doesn’t snow or ice storm or drop below 40 degrees.

But I want swimming and bare shoulders.  I want warm night breezes and cemetery picnics.  I at least wanna be able to hike without my fingers and toes going numb.

So we have a few options to get us through the next few months before fruit and flowers and sunshine and shorts weather returns.  If you are a disciple of summer like I am, then you will be flying away to Thailand next week to visit your best friend.  The temperature in Bangkok today? 80 degrees.  For the rest of you, these trailmix cookies will help.


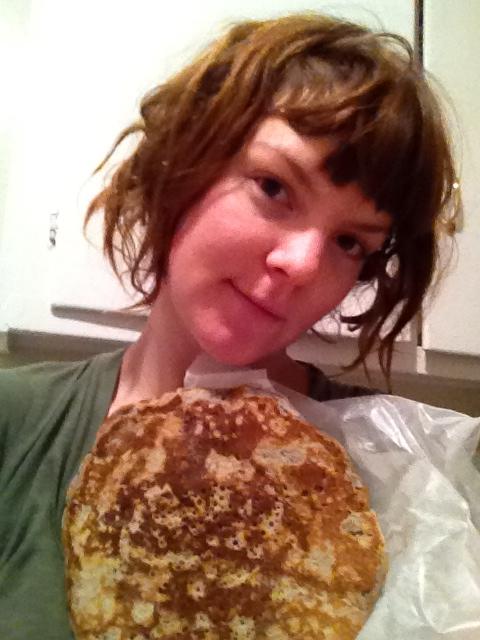
Doesn’t this picture *feel* like summer?  I’d like to tell you that these cookies taste like fireworks and frisbees and cold beers on the beach.  But they don’t.  THEY TASTE BETTER.

This recipe is the standard, delicious chocolate chip recipe from Cook’s Illustrated, adapted by Butter Baking blog, but with butterscotch chips and trailmix instead.  They are soft and chewy and sweet and salty and god-damn delicious.  

Butterscotch Trailmix Cookies
adapted from Butter Baking

Ingredients:
2 C. + 2 Tbs. AP flour
1/2 tsp. baking soda
1/2 tsp. salt
6 oz. butter (1 1/2 sticks), melted and cooled until warm
1 C. packed light or dark brown sugar
1/2 C. white sugar
1 egg
1 egg yolk
1 tsp. vanilla extract
1/2 C. butterscotch chips
3/4 C. trail mix (whatever type your heart desires! mine had: raisins, cashews, cranberries, almonds, sunflower seeds and pepitas)

Directions:
Mix together the dry ingredients in a small-ish bowl and set aside.
In a larger bowl, mix sugars and butter together. 
Add egg, egg yolk and vanilla to sugar butter bowl.  Mix all wet ingredients til well combined.
Add flour mixture to wet ingredients and mix until just combined.
Add chips and trail mix.

Refridgerate dough 30 mins (not much longer or it gets pretty hard) and preheat oven to 325 degrees.  
Scoop out dough and roll in your hands to make balls approximately 1.5-2 inches in diameter.  To give them a “bakery-made” look, you then tear the ball in equal halves, flip the torn sides to the top, and rejoin the pieces at the base.  Leave the jagged side up and place on parchment-lined baking sheets. 

Bake 12-14 minutes, rotating trays half-way. 

Enjoy!


Tuesday, January 15, 2013

Mango Coconut Muffins


This recipe evolved as many of my recipes do—ingredients in need of a purpose.  I had a bunch of mangoes going bad in the fridge. I’d bought some toasted wheat germ on a whim. And I wanted something breakfasty and healthy.

These muffins fit the bill pretty well.  They’re only 145 calories each, and have 3 grams of protein, 2 grams of fiber and only 9 grams of sugar.  They’re also dairy-free and not too sweet.  But between the coconut oil and the coconut flakes? Each of these puppies is clocking in at 7 grams of fat.  Not exactly ideal, but when combined with the protein and fiber in each muffin they make for a quick, filling breakfast. And didn’t you make a resolution to eat breakfast this year? Do yourself a solid by throwing in a piece of fruit and some low-fat yogurt.

Mango Coconut Muffins
makes approx. 20 muffins

Ingredients:
1 1/2 C. whole wheat pastry flour (all purpose flour will yield a muffin with slightly less fiber/protein)
3/4 C. coconut flakes
1/2 C. brown sugar, packed
1/2 C. toasted wheat germ
3/4 tsp. salt
2 T. baking powder

2 C. mango puree
3/4 C. almond milk (or soy, or regular—you could probably substitute juice as well)
2 large eggs
1/3 cup coconut oil, melted (another vegetable oil will do, and reduce the saturated fat in the recipe)
1 tsp. vanilla

Directions:
Preheat oven to 350 degrees. Place muffin liners in baking trays or spray trays with cooking oil.
Mix all dry ingredients.  Mix all wet ingredients (note that if your wet ingredients are still cold from the refridgerator, the coconut oil will start to re-solidify, and if your coconut oil is too warm it will start to cook the eggs.  Room temp ingredients are best!).  Add the wet ingredients to the dry and mix until just combined/all dry ingredients are moistened.  Quickly scoop 1/3-1/4 cup servings into muffin trays and bake 15-25 minutes, or until cooked through and slightly browned.


Thursday, December 13, 2012

The Cadillac of Pancakes


Or maybe it's a poor man's souffle.  Either way, it is the best breakfast food ever (except bacon).  Yes, gentle reader, I am speaking of the formidable DUTCH BABY.  Of all the delicious foods I read about in Molly Wizenberg's wonderful book, A Homemade Life, this was the thing I made first.  Now that I think of it, I never made anything else.  I guess I just never got over that dutch baby. 

Technically a pop-over, there is no hangover this Baby can't conquer.  A strong cup of coffee and some of the aforementioned bacon are the only accoutrement required to make you feel like you are the king of life.  It also says "I love you" better than scrambled eggs and wheat toast.

Molly makes hers in a cast iron skillet.  Having only recently purchased a cast-iron skillet, I've been making mine in a souffle dish and have come to prefer them that way.  An 8-inch straight-sided souffle dish gives the Baby a real lift, and is the perfect size to split with a loved one.  I've tried many a topping on these puppies, but lemon juice, powdered sugar and blueberries is really the way to go.

Without further adieu....Dutch babies!!!

Adapted from Molly Wizenberg's blog, Orangette, February 2005.

Dutch Baby:
4 Tbs unsalted butter
4 large eggs
½ cup all-purpose flour
½ cup half-and-half

Topping:
Juice of 1 lemon, zest if yer feeling zesty
Powdered sugar
½ cup blueberries (You can also combine lemon juice and sugar with some jam or preserves if you lack fresh fruit and make a tasty sauce.  Frozen fruit also works well in this manner.)

Preheat the oven to 425 degrees Fahrenheit.  Put 4 Tbs butter in 8-inch souffle dish and allow to melt in oven.  Impress your breakfast partners by removing the hot souffle dish from the oven and swirling the butter up the sides to coat.  If your oven mitts suck, or you lack daring-do, you can use a pastry brush.

Molly would have you use a blender for the flour, half-and-half and eggs.  You can whisk them in a bowl, too, it won't hurt the Baby.  Pour thoroughly blended batter into hot souffle dish and return to oven.  Bake approximately 25-30 minutes.  It will smell DIVINE.

Remove your Dutch baby from the oven and with quick fingers or tongs transfer to a plate.  Squeeze on lemon juice, sift powdered sugar generously and toss on the fruit or fruit sauce.  Eat it fast, while it's hot.  Serves two.

note: another repost from Cooking With The Good Looking—my first blog post ever, by the way!

Uncle Buck Pancakes


Uncle Buck is one of the few movies I own, and has the best 80's fashion of any of John Hughes' movies (in my humble opinion). After having declared he'd never seen it (!!!), my good buddy Brandon and I spent a nite in with John Candy and company.

He came to two conclusions. 1. That his entire outlook on childrearing had changed, and 2. WE HAD TO MAKE THOSE PANCAKES.

And so we drove off to the restaurant supply store near Jack London Square to look for equipment. The take? A 25" pizza pan and 12" pizza peel for a spatula. Our batter recipe came courtesy of Isa Chandra Moskovitz' Vegan With A Vengance. Based upon her recipe's stated yield, I calculated that we were going to make the equivalent of SIXTY PANCAKES. We were going to have to recruit a very hungry group of friends.

However, Uncle Buck's movie magic was not on our side. All attempts at flipping pancakes the size of our makeshift griddle fell apart. We did pull off some respectably sized 13-15" beauties, though.

Attempt number two is already in the planning stages. We're trading in the pizza peel for a snow shovel. Your bum uncle would be proud.
                          

note: this is an old post from a previous blog that i’m decommissioning.  It fits in nicely over here at Obsessed with Waffles, if you ask me!

Soba Oatmeal Pancakes


These were a serendipitous creation.  I had some leftover oatmeal.  I mean, isn’t there always leftover oatmeal? I wanted to use it for something.  I immediately thought pancakes.  And as I was reaching for my big lovely glass jar of all-purpose flour, I spied some soba flour that had been kicking around the pantry.  Hearty steel-cut oats, earthy soba flour—these were just the pancakes a cold, rainy morning was asking for.  None of these fluffy, spring-time flapjacks.  Winter calls for foods more substantial.

And I must say, I’m way pleased with them.  They have great texture—slightly chewy, toothsome, and spiced just so.  And in addition to using up a a food stuff that usually goes directly into the compost, they also freeze wonderfully.  These are qualities that further endear any delicious eats to me, and things which I spend a lot of time talking about over at  Martha Mcgyver.  I kind of HATE pancakes (you SEE the name of the blog, right?) in the amount of babysitting they require on the stove, so cooking up an enormous batch and then freezing them after saves you time and food.  Hell yeah.


Soba Oatmeal Pancakes

makes approx 8-5 inch pancakes

ingredients:
3/4 C. all-purpose flour
1/4 C. soba flour
2 TBS sugar
2 tsp baking powder
1/2 tsp salt
1/2 tsp cinnamon
1/4 tsp ginger
1/2 C. cooked oatmeal (i prefer steel-cut, but any ol’ oatmeal will do)
1 C. milk or water or milk substitute (i bet almond milk would taste fantastic!)
1 large egg
2 TBS melted butter, coconut or other vegetable oil
1 tsp vanilla

directions:
1. Combine all dry ingredients in a medium-sized mixing bowl, preferrably one with a spout (it makes for easy pouring.  Although if you’re being hella meticulous you could also use a ladle to get uniform cakes).
2. Heat a large frying pan over very low heat.  You’ll get much better results if you let your pan slowly and fully heat before the pancake cooking commences.
3. Combine all wet ingredients (yes, oatmeal is a wet ingredient!) in a separate smaller mixing bowl (spouts help here too) or if you have a 2 cup+ liquid measure you can mix them in there as well.
4. Pour the wet ingredients into the larger bowl containing the dry ingredients.  Mix until just barely combined—It’s okay for it to be lumpy and still have some small pockets of dry ingredients.
5. Make sure that your frying pan is warm (I usually have my gas range dialed to 3 out of 10) and mist with some cooking spray (or butter or oil.  Whatever makes you happy).
6. Pour about a half-cup of batter into the pan.  This is a thicker batter, so I often swirl the pan a little to help the pancake spread a bit.
7. Once the surface is covered in little bubbles and the edges look less wet, flip!  Cook through the other side of the pancake for a few minutes and serve.

These are good with butter and syrup, obviously, but I eat ‘em with just butter as well.  Cheers!

Thursday, November 15, 2012

Green with envy


This beauty is from Cam Huong in Oakland on Webster St.  It was dense, chewy and coconut flavored.  Why green? I can't say.  However Cam Huong has a 4 star rating on Yelp, and their banh mi is oh-so good and oh-so cheap, so I will not question them.  Also, lets bring back the hand-held waffle!